Tattler – a notification system for humans#
Are you building an online service and need to send beautiful, branded notifications via email or SMS to your users?
Tattler makes that easy for you. Your application makes a simple HTTP call to tattler:
curl -X POST 'http://127.0.0.1:11503/notification/mywebapp/password_changed/?user=123'
and tattler does this for you:
Load your templates for event
password_changed, and see where it should be notified. (Email? SMS? More?)Load the email address and mobile number for user
123as required – with trivial-to-write plug-ins.Load any variable that your templates require – with trivial-to-write plug-ins. (What plan is the user on? How much of the plan is used up?)
Expand the template and encode the content into an actual notification – e.g. a multi-part MIME email with HTML and plain text fallback.
Deliver the final content through SMTP and an SMS delivery network.
Tattler is designed with simplicity in mind. It strives to be easy to adopt and useful among common needs – so you can focus on your communication, brand and customer journey.
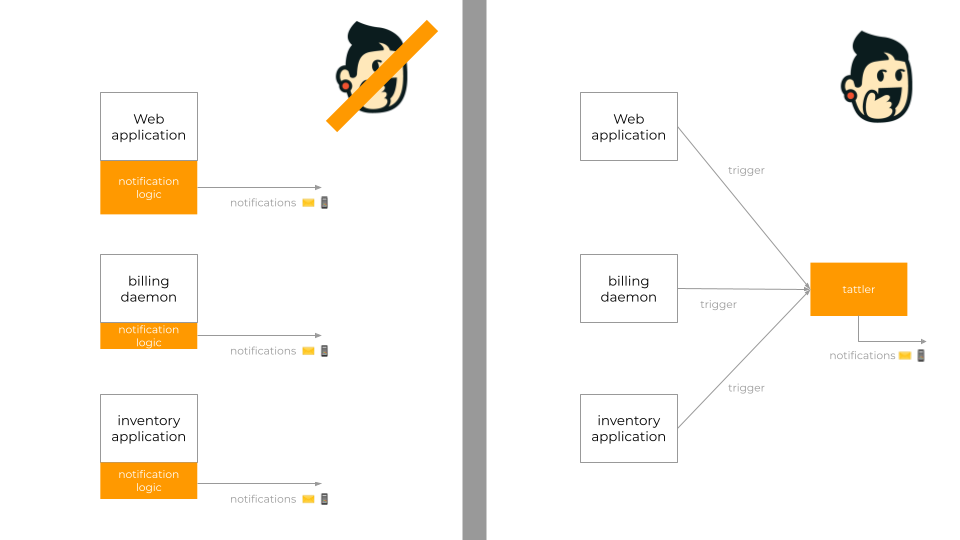
If your system sends notifications from multiple different softwares – say a web application, a billing daemon, and a cron job which monitors inventory – then your simplification gains with tattlers get multipled 🚀
Examples#
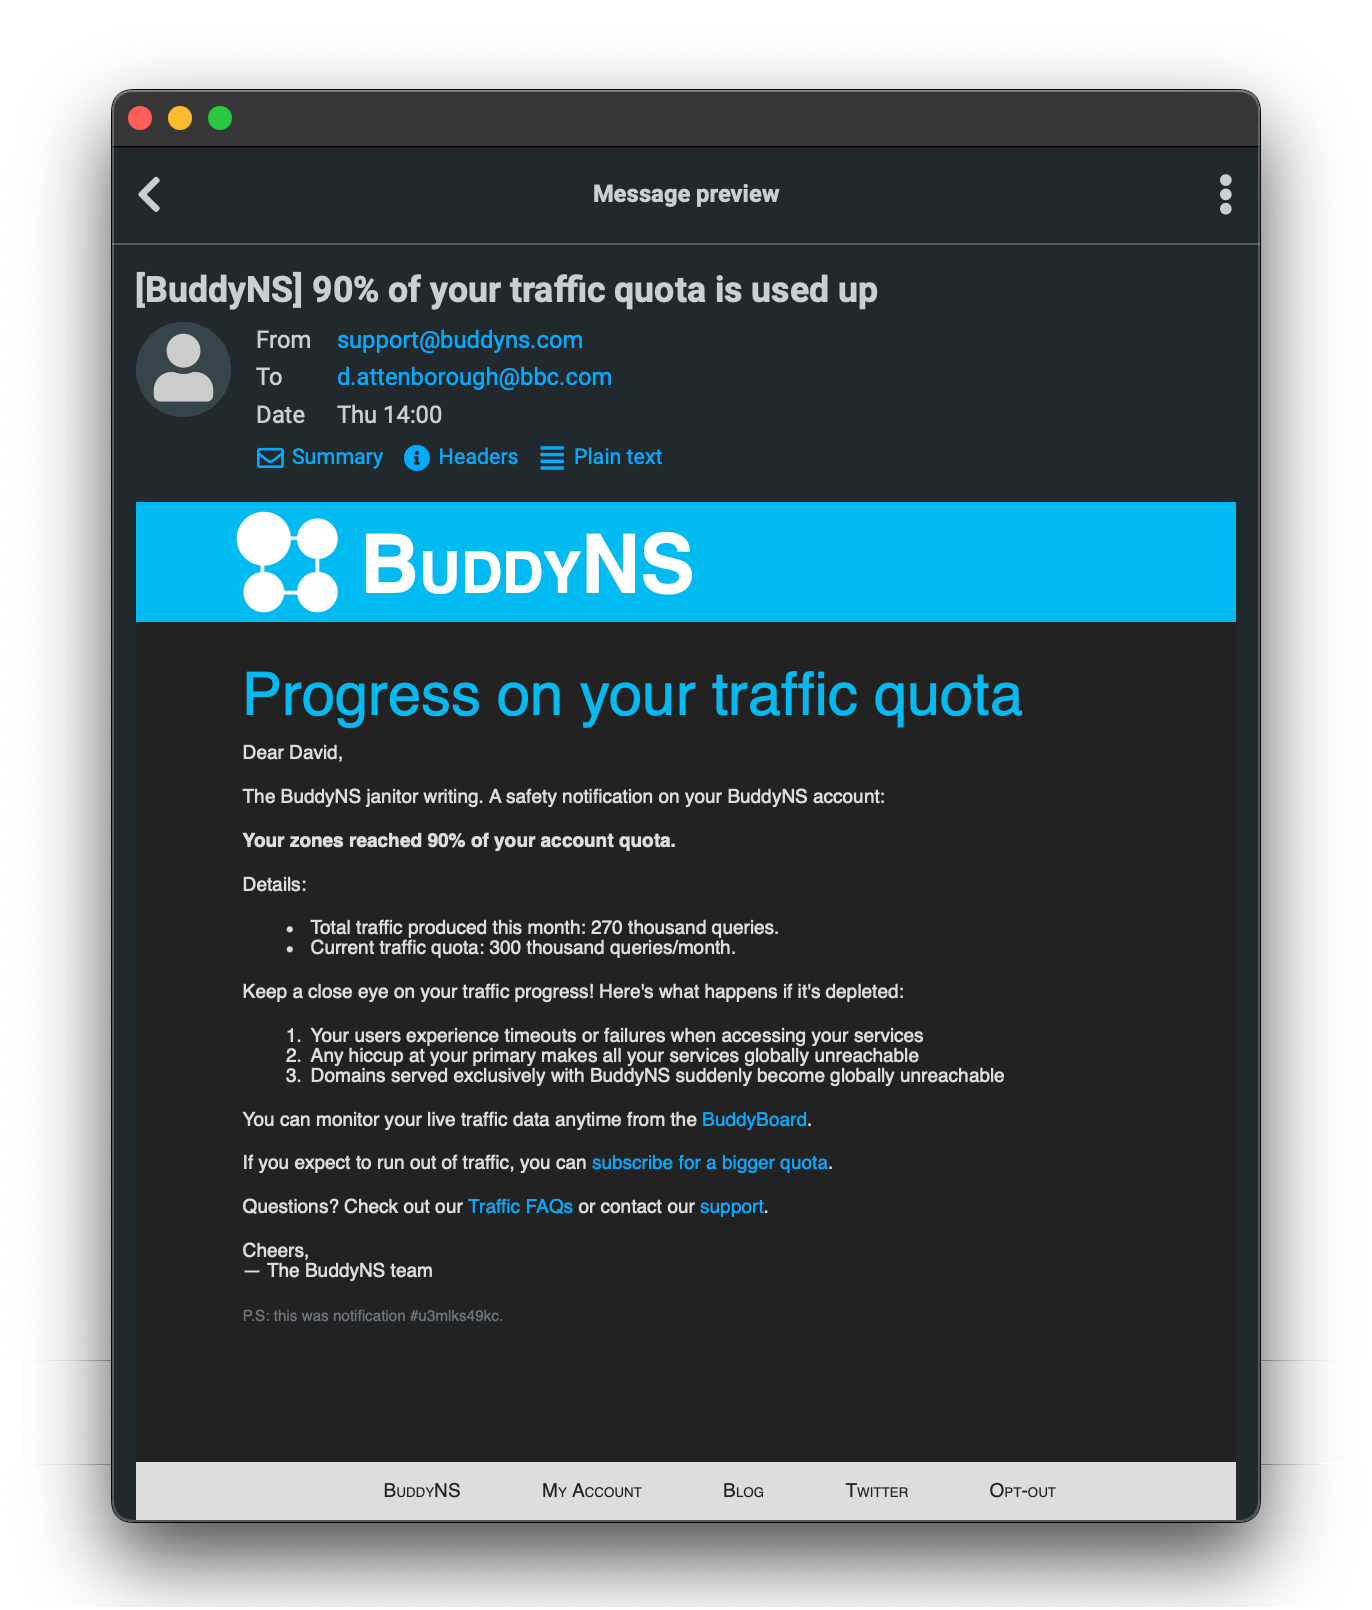
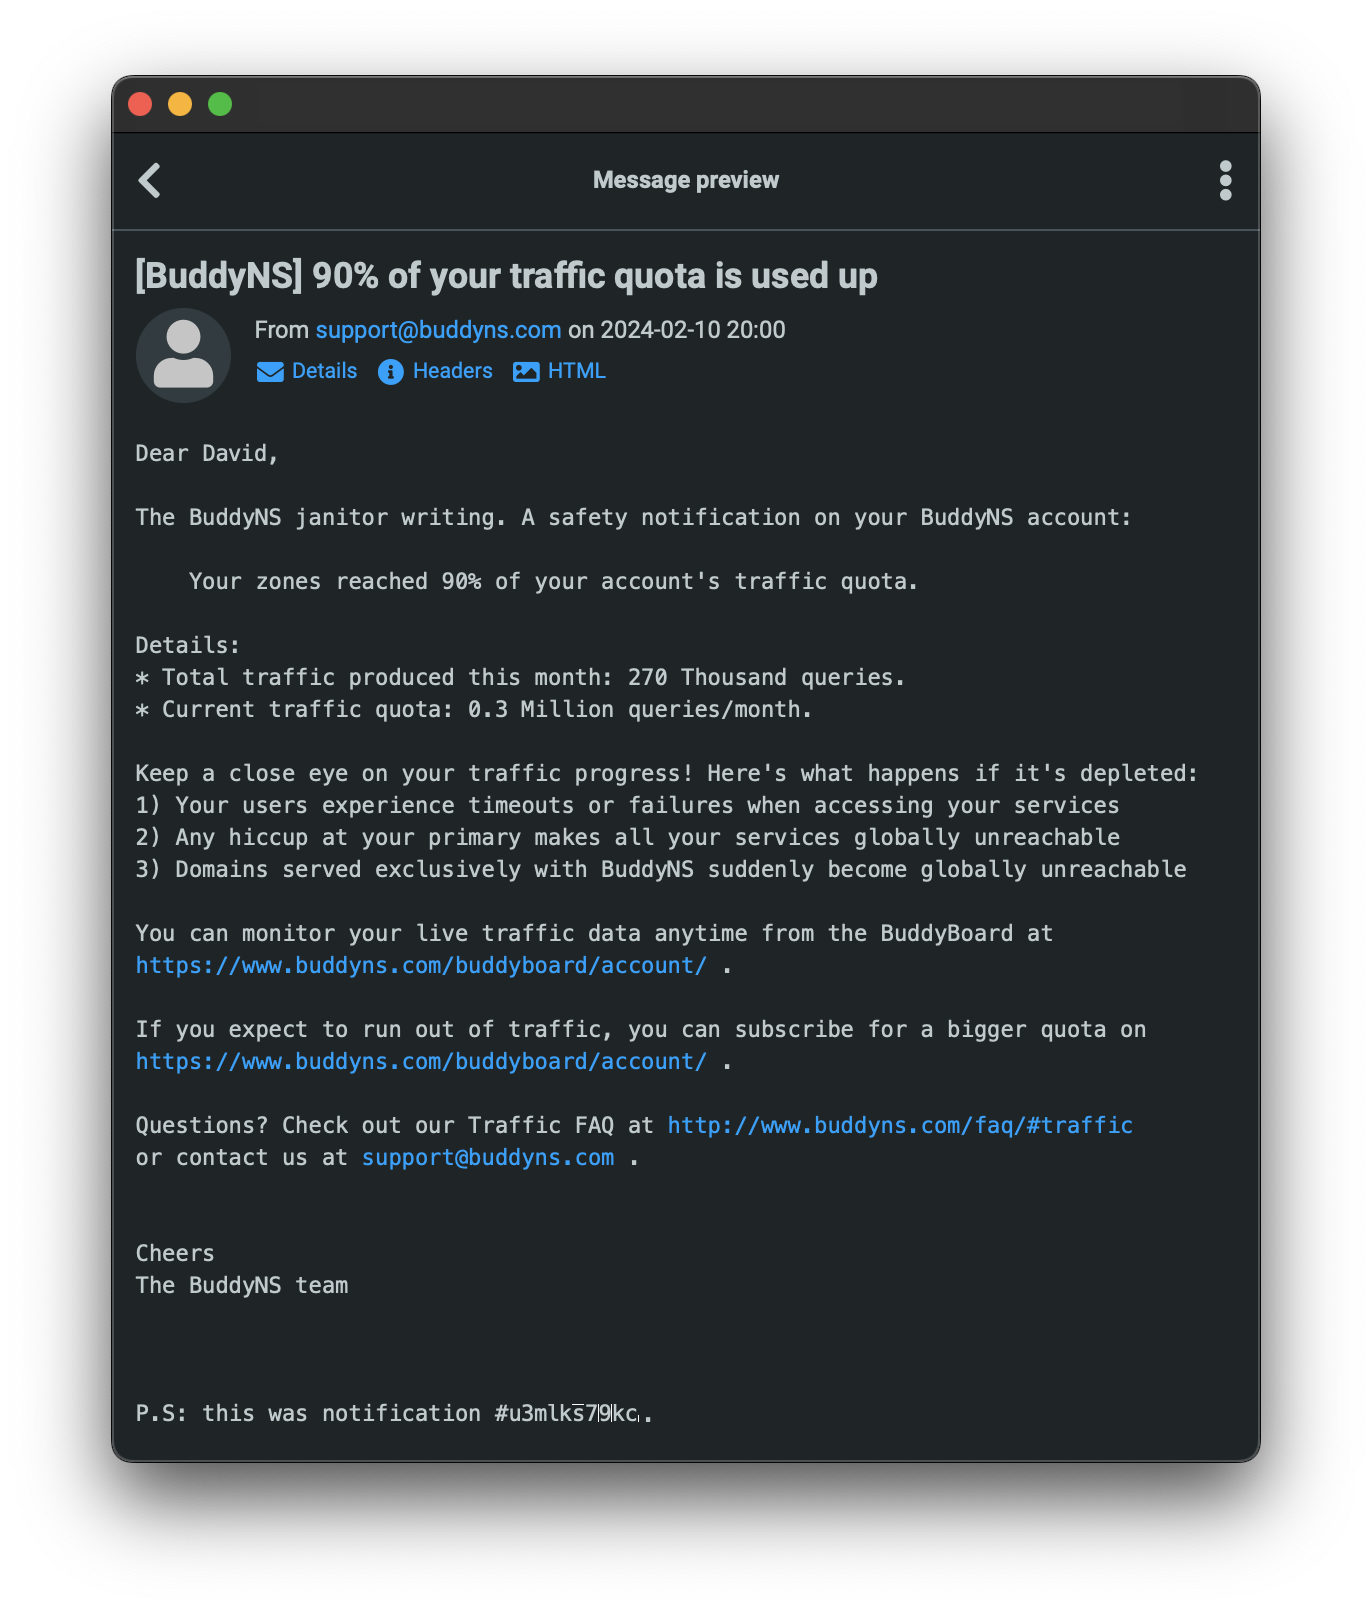
Here’s an example notification with HTML email, and its corresponding plain text version:
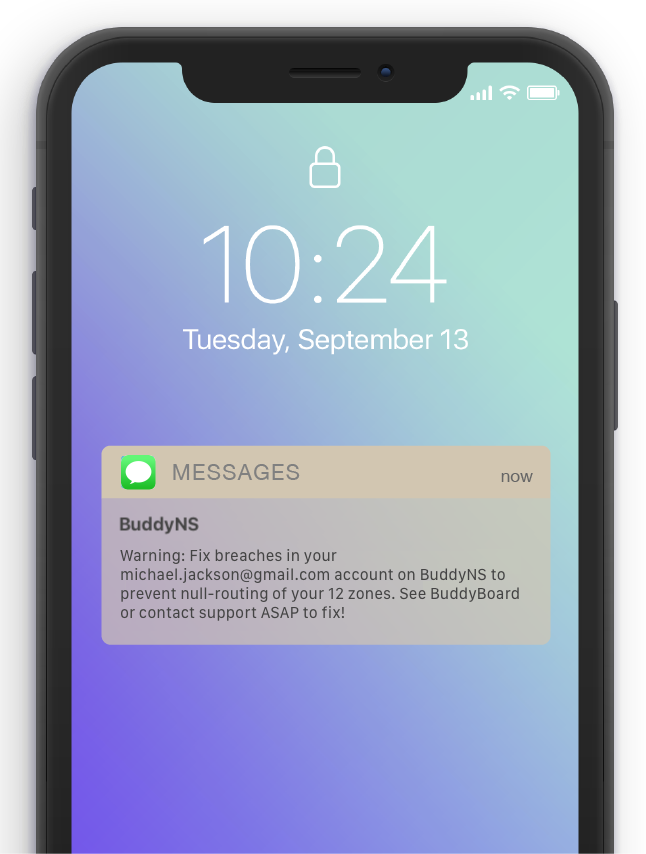
And here’s an example SMS notification:
Why tattler?#
Introducing Tattler simplifies code and consolidates your communication to your users, making it easier to manage and improve.
- Product managers
Will love having a clear view of the communication across the customer journey, and the ease of improving it.
- Template designers
Will love the design power and ability to focus on content without technical distractions.
- Developers
Will love the massive simplification in their code — firing notifications without having to collect all ancillary data.
- Customer support
Will love being able to easily trace notifications to log trails in other systems that led to firing them.
- Sys admins
Will love having one single point of exit for notifications and the ease of compartmentalizing access to sensitive data.
Tattler is well-documented, has safeguarded longevity and has outstanding quality thanks to its exceptional 90%+ test coverage.
License#
Tattler is open-source software (BSD 3-clause license), and includes the features listed above.
Enterprise users#
Tattler is enterprise-friendly. Enterprise users avail of a subscription which provides a bugfixing warranty, extra features, and patronage for the continuity of the project.
See Tattler enterprise for more.
Contents#
Proceed to the following contents to learn about deploying and using Tattler for your project.